As engineers, we're trained to keep machinery "alive." Maybe you're considering adding some plants to your home or office space. You'll need to know how to keep those alive, too. Setting up a calendar reminder is one way to keep your greenery hydrated—but if you want to go from preventive to predictive foliage maintenance, you'll need a moisture sensor.
Connect Soil Moisture Sensor to Arduino
The good news is that this kind of sensor—or hygrometer—is easy to come by, and it's simple to integrate into an Arduino or other computer-based system. Here we'll discuss the basic setup and testing of two moisture sensors. One is based on conductivity, with an analog and digital (on/off) output; the other is a capacitive soil moisture sensor, which only "speaks" analog.

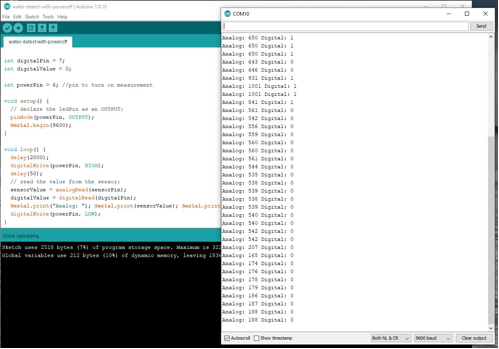
Serial output from intermittent sensing code
Soil Moisture Sensor Arduino Code
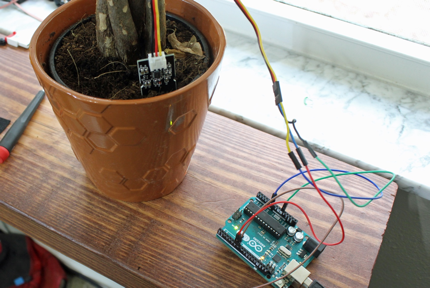
The resistive digital/analog sensor features two forks that get inserted into the soil, as well as a separate amplifier unit with an LM393 comparator. To set it up, connect the two terminals from the fork assembly to the two-terminal side of the amplifier, then plug the forks into the soil. Connect the wires from the other (4-pin) side of the amplifier to an Arduino board. The VCC goes to 5V, GND to ground, A0 to an analog pin, and D0 to a digital Arduino pin. You can then run code found here to get it to output the sensor value via the serial port.
Note that 0 here indicates the sensor has sufficient water based on how the trimming pot is adjusted on the amplifier, and 1 means that it's dry. Also, the analog value you see on an Arduino or other microcontroller board decreases when water level increases, corresponding to the decrease in resistance. There is, however, a bit of a problem with taking readings this way as a small current gets induced in the soil. This current causes electrolysis and degradation of the leads, an effect illustrated nicely in this video by Andreas Spiess.
There are solutions to this dilemma. You don't have to take readings continuously with these sensors—every half hour or so is sufficient enough to keep a plant hydrated. I wrote example code on how to do this here, using pin 6 to power the sensor unit directly. The sensor draws only 7.2mA with both LEDs on—well within the range of what an Arduino Uno can supply.
The illustration code checks moisture levels roughly every two seconds, and the time can be lengthened as needed. Such an intermittent checking system would also be ideal for remote installations where battery power must be carefully managed.

Capacitive sensor hookup is nearly identical to resistive; however, the on/off digital reading is left floating.
Capacitive Moisture Sensor Solution
Another solution to the hydration dilemma is to use a capacitive sensor, featuring a TLC555C chip, which can be purchased as an all-in-one pluggable PCB. In this case, the 5V and GND are hooked up in the same way as the resistive sensor, with only an analog output. Analog values here also go down with increased moisture, but the scale is different than with the resistive sensor. Also, as a capacitive sensor, the capacitance increases if you're touching it, so these can have several alternative uses if needed.
Previously linked code will also work for the capacitive sensor, though the digital input will be left floating. This particular sensor uses less than 4mA of current, so the cutoff code isn't an issue either.
Hopefully, these sensors will get you thinking about all kinds of small-scale agricultural projects. If you need extra inspiration, check back for an upcoming articles in this series, where I turn the sensor into a low-water warning system.


