We previously explored how you can control an Arduino board with infrared signaling, but can they also control other devices as an Arduino IR remote? The short answer is ‘yes,’ but as with any sort of interesting electronics technique, there are a few more details.
Arduino IR Sensor Tutorial
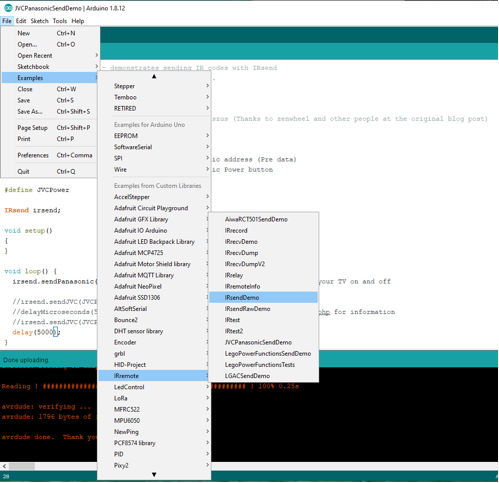
If you haven’t already, install the IRremotelibrary on the Arduino IDE (as outlined in the previous IR control post), then open up the examples. Note that several examples reference sending IR signals. These use Arduino pin number 3, which can use PWM signaling to pulse at the proper 38 kHz carrier frequency implemented in most electrical devices.
Arduino IR Sensor Tutorial
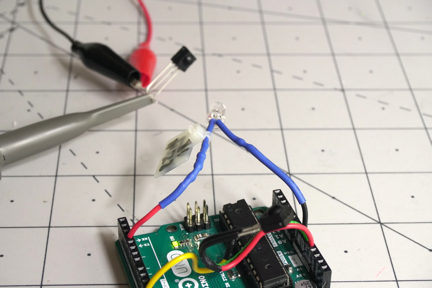
Connect an IR LED to Arduino pin 3 and ground, along with an appropriate resistor, if needed. Depending on your IR emitter's power output, you may want to implement a transistor for control, though you likely won’t have any issues with short IR signal bursts sent out during experimentation.

IRremote library
How you test your setup will vary, depending on what hardware you want to control. The standard IRtest demo sends out a signal to turn a Sony device on or off every 5 seconds. The JVCPanasonicSendDemo sends a power signal for Panasonic and JVC devices in a similar manner. Necessary or not, I commented out the JVC control lines before successfully turning on and off my Panasonic TV with the Arduino Uno and IR LED. There are a variety of other examples available for more devices, and the IRtest2 code allows one Arduino to control another.
Read Arduino IR Codes
Note that your particular remote value may or may not be stored in these examples. Using an IR receiver, you can read the codes from a remote and duplicate them in your code. With these codes in hand, you can then make a custom IR remote to interface with one device after another, entirely adaptable to your needs.
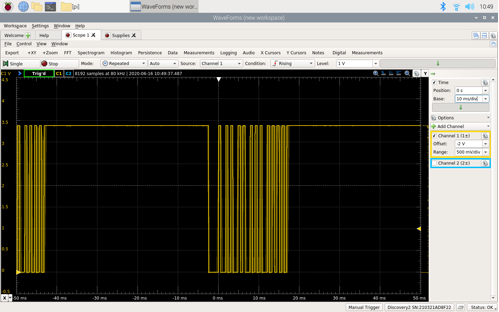
More generally speaking, if you would like to know if your emitter is actually doing anything, you can replace it with a visible LED to see if it blinks a signal. Alternatively, you can find a camera without an infrared filter, like the Raspberry Pi's NoIR V2 that allows you to see IR light. Finally, if you have a receiver and an oscilloscope, you can hook it up and look at the incoming signals on-screen. There’s a bit of a caveat to this, as simply turning the IR emitter on doesn’t necessarily mean the receiver will respond in kind.


Testing on Raspberry Pi Analog Discovery 2 oscilloscope setup.
Carrier Frequency vs. Light Frequency
While certainly obvious to some, infrared light is emitted at between 300 GHz and 430 THz, well above the 38 kHz carrier frequency used in IR signaling. An IR receiver generally features a dark covering to block out higher (than IR) frequency visible light, but note that the carrier frequency is orders of magnitude slower than either. Once the proper emitter/receiver is selected with the appropriate IR source, we can mostly forget about the light’s gigahertz- and terahertz-range vibrations.
A purpose-built receiver like the Vishay TSOP4838 also filters out light that shines constantly, and signals that switch slower than the designated carrier frequency. Therefore, if you try to test an IR signal by simply switching it on to generate a constant beam of light, you’ll get incorrect (if any) results.
If things aren’t working properly with your IR receiver, try signaling it with a TV remote to see what happens. Alternatively, a standard IR phototransistor or photodiode will sense the proper “color” of IR light without regard to the carrier frequency—potentially useful when troubleshooting.
IR Control for Today and Tomorrow
While IR signaling has its limitations, it’s inexpensive to implement and tends to just work. Newer technologies like Bluetooth and WiFi can be excellent for many applications, but IR should still be “in control” for years to come. With Arduino and other similar dev boards, IR signaling can be used as you see fit, and can even provide a bridge between technologies.


