While we can’t touch it, light surrounds us, allowing us to see and go about our daily lives. It also allows crops to grow, keeps us warm and even provides solar energy for an increasing number of rooftops.
If you want to actually measure light intensity, there are a number of ways to do so. I'll outline a couple options here in the context of Arduino usage. Of course, what’s presented here is only the tip of the iceberg, and these concepts could be applied to a wide variety of embedded systems.
LDR Sensor: Light Dependent Resistor
Photoresistors, also known as light-dependent resistors or LDRs, are components that change their resistance to electricity based on the amount of light they receive. They are almost exactly what they sound like: two-terminal devices that resist the flow of electrical current in a circuit, with decreasing resistance based on the amount of light received.
How to Connect an LDR Sensor to Arduino
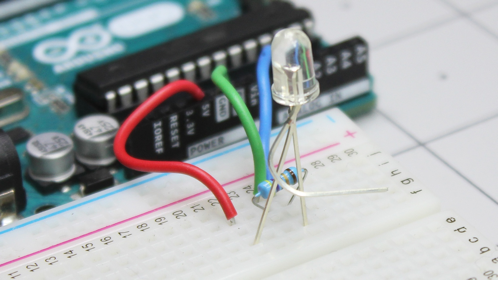
Arduino boards and the like can’t sense resistance directly, so you’ll need to set up a voltage divider (as shown in the above image). Here the 5V pin from an Arduino Uno is connected to an LDR, while the other leg is connected to A0 and a ~50 ohm resistor. The other leg of this resistor is connected to ground, forming a voltage divider and allowing A0 to sense the relative resistance of each leg. The result is a number that can be correlated to different light levels. Code found here is used to analyze this setup in the Arduino IDE, recycled from this soil moisture sensing post. As with the following phototransistor experiment, you can add in a delay() function to the sketch if the serial monitor is getting too “clogged.”
Easy to implement and very inexpensive, LDRs are the go-to sensing method for many projects. Note that like “normal” resistors, LDRs come in different low- and full-light resistance values. Be sure to consider that when buying/spec’ing these components, as one may work better than another for your application.
Phototransistor Circuit with Arduino

Phototransistors react to light by varying current flow from collector to emitter in the same manner as a normal transistor, but are activated by light instead of an external current input to the base. The collector here is connected to +5V on the Arduino, while the emitter leg is connected to A0, along with ground through a ~50 ohm resistor.
The setup here is nearly identical to the photoresistor arrangement seen earlier, and the same code works here as well. However, expect the values corresponding to different light intensities to be different.
Note that the base leg of the BPV11 component used here is broken out, but it’s not needed in this case and is left unconnected. When connected to a positive 5V, the output will be high, while connecting it to ground gives a low output. Some phototransistors omit this lead altogether as a two-legged version. There may be applications where you’d want to override the component’s light-sensing function, or compensate for certain light levels with the base, so the three-legged version is appropriate in some circumstances.
Photodiode & Arduino
Another option for light detection is the photodiode. One difficulty with Arduino experimentation with this device is that many come as a surface-mount device, such as this VEMD5510CF, requiring rather advanced soldering skills if you don’t have a printed circuit board for it. Others, like the BPW83 component, are through-hole, but are designed to sense light in the infrared spectrum. Still, these components certainly have appropriate use cases, so don’t forget about this option, especially when putting together a circuit for mass production.
Light Sensors & Wavelength: More Considerations
Whatever technology you choose to sense light, it is important to pay attention to the wavelength range to which it responds. 380–740 nanometers is the approximate range that our eyes can see. Others filter out visible light to respond to IR remote controls and the like. Different ranges are useful in their own right, but engineers and designers must be careful to spec’ the correct part to avoid frustration.
There are of course a variety of applications for this type of sensing. One could even use this type of light-detecting hardware to enhance a greenhouse/plant growing setup, such as the Raspberry Pi-based rig seen here.


