The Coral Edge TPU dev board is an impressive system, but it requires some flashing before it can perform useful AI/ML work. For those who are well-versed in command line operations, the several page lengths of instructions on Google's website might be all you need to do a successful install.
Others (this author included) may need a little help. While this article doesn't replace Google's document, it should act as a "helpful hints" supplement. I'll outline some of the mistakes I made while flashing the Coral TPU dev board and offer suggestions on you can avoid or fix them.
Materials Needed to Flash the Coral Dev Board
Unlike boards like the Arduino Nano, which require only a single cable to get things going, you'll need a non-trivial assortment of accessories for the setup. These include:
- USB A to Micro USB cable
- USB C to USB A cable for data transfer
- A USB C power supply capable of providing 2-3A (I was able to successfully use a second USB A to USB C cable plugged into a power supply)
- Linux or Mac computer
Yes, if you're only running Windows, you're out of luck here. However, it might be possible to set up a dual boot configuration on your computer or run off a USB stick. It's also, according to this article, possible to run off of a Raspberry Pi, which could be a very convenient option.
For this experiment, I pulled my trusty T60 Ubuntu rig out of the closet, which hadn't had many updates in the last few years.
Preparing to Flash: Initial Setup

Follow these steps to begin the project:
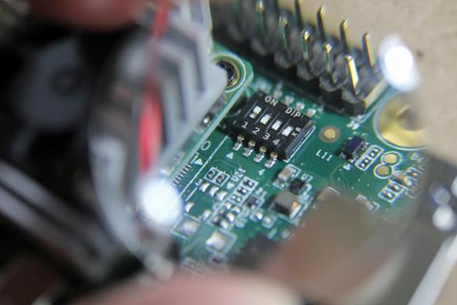
1. Make sure the dip switches are set correctly (ON, OFF, OFF, OFF). The assembly is small enough to be hard to see, so there's of course no shame in using a magnifying glass.
2. Download SDK-Platform Tools for Linux from this page and extract in the Downloads directory before you start.
3. DON'T plug anything in yet, but you'll need to install several apps via terminal commands.
4. Input sudo apt-get install screen, mkdir -p ~/.local/bin, and sudo mv ~/Downloads/platform-tools/fastboot ~/.local/bin/.
5. Verify that everything works by typing fastboot --version, which should return some information on it.
Mine did not return any information, leading to the first important and painful lesson: Update your Linux installation before starting!
Google's instructions say to use a "Linux or Mac computer." What they don't explicitly spell out is that you need a Linux computer with a modern OS (one would assume Mac computers have the same requirement).
As it turns out, my original version of Ubuntu was 12-something, while the latest LTS version is 18.04. This is quite a gap, and required several upgrade cycles to get it up to date. If you're having issues with your install, definitely start here.
Text Input and Correcting Text Issues
Once you're up to date, follow these steps:
1. Input the following into the terminal:
sudo sh -c "echo 'SUBSYSTEM==\"usb\", ATTR{idVendor}==\"0525\", MODE=\"0664\", \
GROUP=\"plugdev\", TAG+=\"uaccess\"' >> /etc/udev/rules.d/65-edgetpu-board.rules",
2. Next, input sudo udevadm control --reload-rules && udevadm trigger.
When you enter the first command, it won't give you either an error or confirmation that you've entered it correctly, so if you'd like to check that you didn't make a typo, enter: cat /etc/udev/rules.d/65-edgetpu-board.rules. You should get a response of: SUBSYSTEM=="usb", ATTR{idVendor}=="0525", MODE="0664", GROUP="plugdev", TAG+="uaccess".
If the commands aren't exactly correct (remember, Linux is case sensitive), it will cause problems in later on. If you run the first command in this section again, it will simply append that text to the rules file. You can, however, open it with the Vi text editor:
- Enter sudo vi etc/udev/rules.d/65-edgetpu-board.rules.
- Delete the problem lines, and add new ones if needed.
- Exit and save by hitting escape then :wq. You can delete blank lines in Vi by hitting escape then :g/^$/d.
Setting Up the Connections


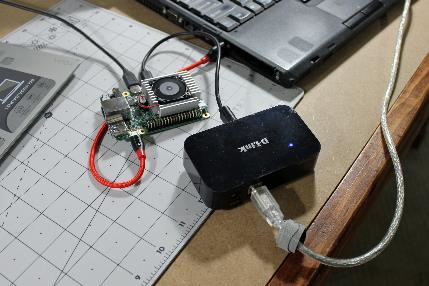
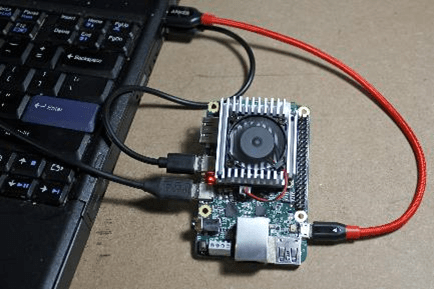
With those steps complete, Google's instructions take you through the physical connections, which are fairly straightforward if you have your cables arranged correctly. Given the number of connections involved, and that you need to attach each one at a different time in the process, I recommend evaluating how everything is getting from one physical area to another. This was initially a challenge on my T60 with only one USB port on the left side.
Note: you shouldn't be trying to power your Coral board with your computer power supply, as providing 2-3 amps will very likely be a challenge here, potentially endangering your host (computer) and Coral board hardware.
Running Fastboot and Potential Issues
Here you'll need to run fastboot using the fastboot 0 terminal command, and connect the USB data line as instructed.
Open a new terminal (in addition to the one already running) and enter fastboot devices. If all has gone well, you will see a number of characters followed by the text "fastboot." If you get a permissions error, there's a good chance you typed something in wrong in the "more text" section. Give that one more look.
Notably, when I initially tried to run fastboot from the ~/.local/$bin directory, it did not execute, but instead prompted me to install the program by typing sudo apt-get install android-tools-fastboot. This wasn't a major issue, but wasn't outlined in the official instructions, so you may or may not need to do this in your case.
Last Step: Flashing the Coral TPU Dev Board
While I wasn't initially able to get the curl command to work as noted, I downloaded the file using this browser instead. Next, I extracted it in Ubuntu's graphical file manager. With that taken care of, you can run the bash flash.sh command from its directory as noted in the instructions. Everything should go on its merry way, flashing your Coral TPU board as a Linux ML/AI Device. While it's flashing, you'll see a variety of text outputs. The process will take a few minutes to complete.
With that complete, you can log onto the newly flashed system with the default username and password of "mendel" for both. According to one report, enhanced SSH security means you might need to follow a few more steps to log on, but this was not a problem for my device.
Google's instructions then note how to log on to the internet and run an example image classification script. With your Coral TPU Dev board flashed and activated, you have a multitude of possibilities. I'm excited to see the new applications people will create with it.
A big thanks to Andrew Schreiber for his help on the article, as well as Alasdair Allan's expanded instructions found here.


