Electronic ink, commonly called E Ink (a trademarked term) or e-paper (for electronic paper), was first developed in the 1990s by a team of undergraduates at MIT. While this tech has had some commercial successes, notably the Kindle e-reader, the use of E Ink has always been an interesting proposition. On the one hand, this class of device is extremely power efficient, requiring no charge to maintain an image. On the other, they have a very slow refresh rate when compared to light-emitting display methods, tend to be expensive, and are generally limited to black and white.
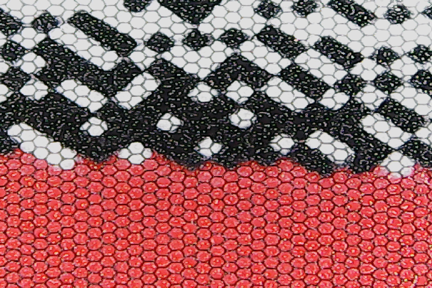
E Ink display under a microscope
Some of these tradeoffs, however, are changing, as evidenced by the Seeed Technology 2.7-Inch E Ink Display. The device is available in the $30 range and features not just black and white, but also red pixels. The tradeoff is that producing images with red takes an extremely long time to refresh. You therefore wouldn’t want to use it as a clock display or even an e-reader. For information that needs to change very intermittently, such as the weather, calendar, or a transportation schedule, it could be a perfect solution.
Raspberry Pi E Ink Installation
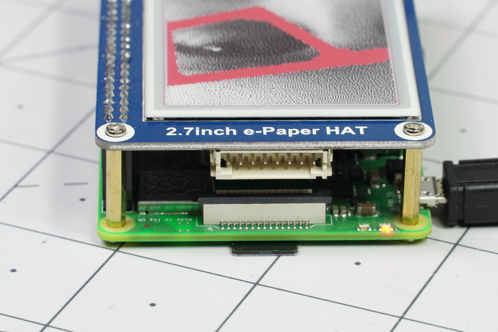
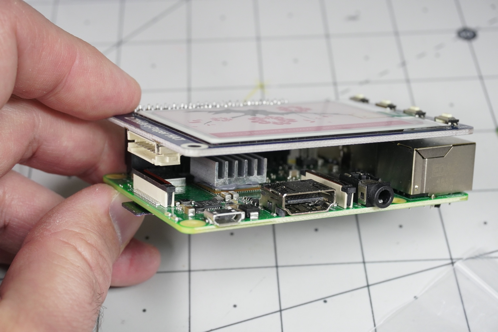
Mounted with screws on a 3 A+, and without on a 3 B+
E Ink displays can be used with a variety of devices, but this one is specifically designed to fit on a Raspberry Pi as a HAT (hardware attached on top). Since I’ll be using it in a headless mode, I chose to install it on a Raspberry Pi A+. It’s not only less expensive, but uses less than half the power of a Raspberry Pi 4B when idling, making it ideal for a low power and slow refresh device.
The display simply plugs in to the 3 A+’s male header pins with its female connection. It can also be secured with included screws and standoffs if you’re so inclined.
Voir les produits connexes
RASPBERRY PI 3 A+
Raspberry Pi Foundation Cartes et kits de développement de systèmes intégrés AfficherE Ink Software Installation
Setting up Pi software for the E Ink display is easy as well, if not quite as plug-and-play. First, download Raspberry Pi OS (formerly known as Raspbian) opting for the “Raspberry Pi OS (32-bit) with desktop” image. The GUI implementation is used here to take care of any software dependencies, not for the interface. Burn the image onto an SD card with balenaEtcher, and set your system up as headless by loading the proper ssh and wpa_supplicant file onto your boot partition. This can also be accomplished later by temporarily hooking up a keyboard/mouse/monitor to the Pi.
Pop the card in your Pi, power it up, then scan your network with a program like Wireless Network Watcher to find its IP address. Log on with username pi and password raspberry. Run sudo apt-get update, then sudo apt-get upgrade to make sure everything is up to date. Enter sudo raspi-config, and change user password to something a bit less default. In this same interface, navigate to Interfacing Options and enable SPI to let the Pi control your E Ink screen. Finally, reboot the system to ensure these changes take effect.
Back in your home directory (cd ~ if needed) enter mkdir eink to create a new directory for your E Ink screen, change to that directory with cd eink, then enter git clone https://github.com/soonuse/epd-library-python to reproduce that repository. With that done, navigate to the 2.7-inch display code with cd epd-library-python/2.7inch_e-paper_b/raspberrypi/python. Finally, run a demo with python main.py, which will cycle through several images on your display.
Raspberry Pi E Ink Display Project


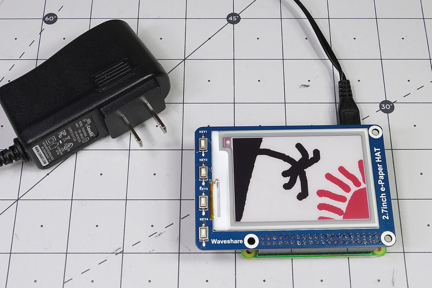
Black island + red sun = calm e-ink imaging
While it’s neat to see the screen refreshing (and enlightening to see how long it takes), you probably want to display some data of your own. An easy way to get started hacking this device is to open up the example. Input ls to see the contents of the directory (noting the presence of two .bmp files), then enter sudo nano main.py to see what’s in the script.
This demo code imports several libraries, including several from PIL (Python Imaging Library). You’ll also see several functions that are easily recognizable, describing drawing lines, circles, rectangles, and text. A “# display images” section defines a “frame_black” and “frame_red” as “black.bmp” and “red.bmp” images, which are stored in the same directory as the code.
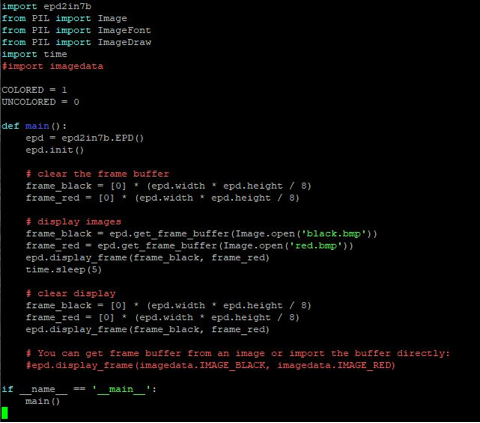
The code seen above (and downloadable in full here) is a stripped-down version of the main.py example. It simply shows black.bmp in black and red.bmp in red, before clearing things out five seconds later.
These BMP files can be edited in image software such as GIMP, Photoshop, or likely even Paint. You’ll just want to maintain the same aspect ratio and note that while the red and black images are displayed as such on the E Ink screen, on your computer they’re simply shown as black and white. To modify your screen’s display, download the images off your Pi with a program like WinSCP; edit, rename, and put them back in the same directory, modifying the code as needed.
E Ink Photo Display & More
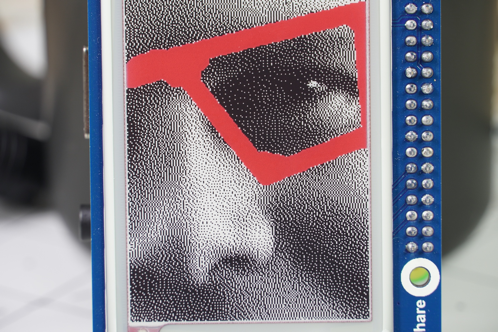
A philosopher-engineer question for the ages: Is a Raspberry Pi with only an E Ink screen headless?
Of course, hand drawings aren’t the only things you can display on your E Ink screen. Figures and graphs could be constructed based on real-time data, and you can create a realistic monochrome image from a real photo using dithering. I used a combination of programs to produce the black and red “self portrait” seen above. The process will vary depending on your editing software, but if you’re using GIMP, selecting Image – Mode – Indexed… will at least get you pointed in the right direction for dithering images.
Beyond what’s covered here, there are four interface buttons that are ripe for experimentation. For a more involved experiment, you might also check out a mini-calendar build on GitHub. Whether an example, or something you duplicate entirely, that code is certainly worth examination to help advance your e-ink experimentation.


